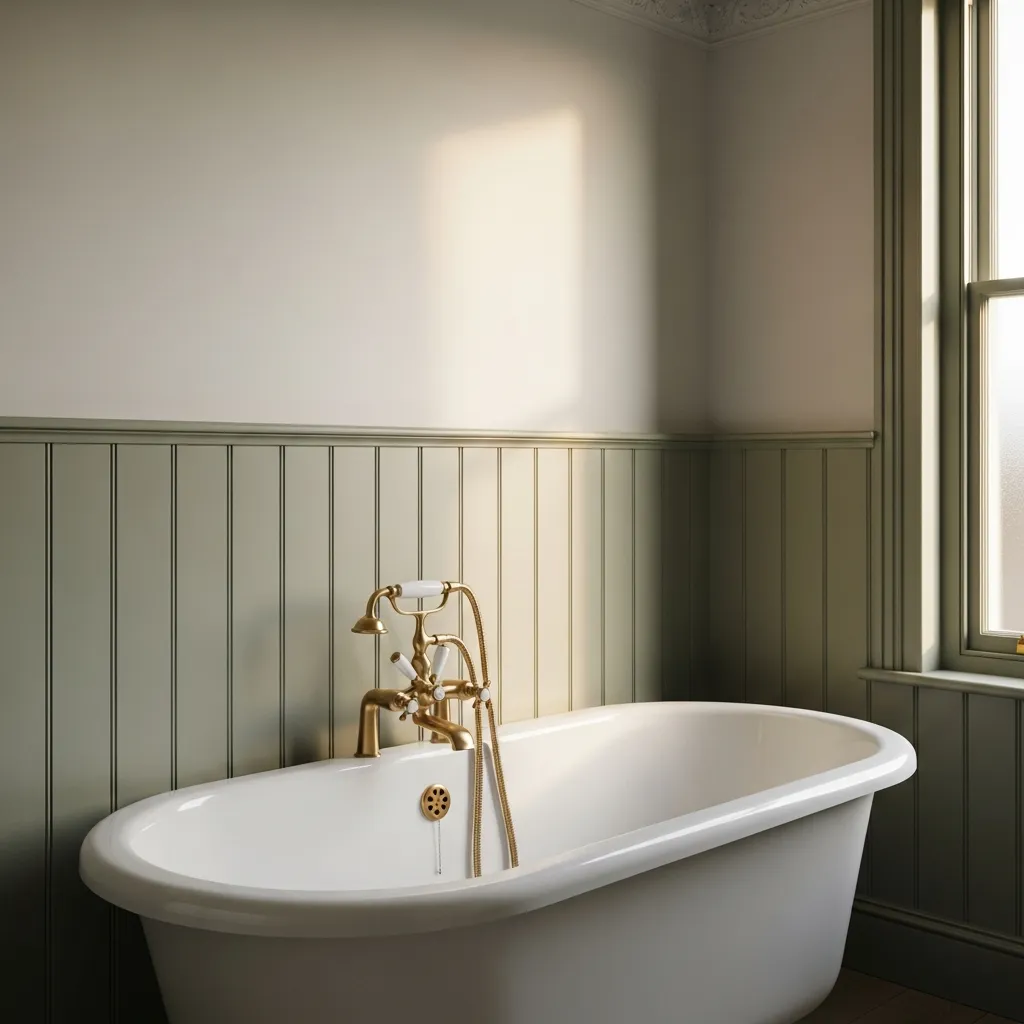
Bathroom Wall Panelling Ideas for Victorian and Edwardian Homes
There’s a comfort to a panelled wall that tiling doesn’t give you. Tiles are cool, flat, reflective — perfectly practical, but a bit clinical if that’s all a bathroom has going on. Panelling brings texture, real shadow lines, and a sense that someone actually built something, rather than just stuck tiles to a wall. It suits Victorian and Edwardian homes especially well, since these were properties built with proper joinery throughout in the first place.
It’s also moved well past the “country cottage” cliché it used to be lumped in with. Panelling has become a genuinely popular choice in London period bathroom restorations, and not just in cottages and farmhouses — plenty of terraced houses in Zone 2 now have it too. This guide covers the main styles worth knowing, how to pick materials that’ll actually survive a wet room, some colour and finish ideas, and how to fit panelling around whatever original features your bathroom already has.
Why Panelling Suits Victorian and Edwardian Bathrooms
Most Victorian and Edwardian homes had proper joinery as standard — skirting boards, dado rails, panelled doors. Panelling on the walls continues that language into a room that, more often than not, didn’t originally exist as a bathroom at all.
That’s actually one of panelling’s best tricks. A huge number of London period bathrooms were converted from a box room, a landing, or the end of a bedroom decades after the house was built, and they may feel somewhat like an afterthought as a result. Panelling gives that space some of the architectural weight the rest of the house already has, tying it back into the property properly instead of leaving it feeling bolted on.
There’s the textural side too. Set against tiling or plain painted plaster, panelling adds genuine depth — shadow lines, a bit of relief, something for the light to catch. It rarely looks flat, whatever finish you go for.
Panelling Styles to Consider
Tongue and Groove
This is the classic — vertical boards slotting neatly into each other, running either full height or as a lower section of the wall. It’s the design most people picture when they hear “panelled bathroom,” and it works in both a strict Victorian restoration and a looser, more contemporary period scheme.
Wainscoting
Wainscoting is half-height panelling, usually finished off with a moulded rail along the top. It’s a genuinely flexible option — enough presence to properly change the room, without covering every wall floor to ceiling.
Flat Panel or Shaker-Style Panelling
A slightly more contemporary cousin of traditional tongue and groove, using flat recessed panels rather than grooved boards. It still sits comfortably in a period property, just with a bit less fuss and a cleaner overall look.
Beadboard
Beadboard uses finer, more closely set grooves than standard tongue and groove, giving a softer, more delicate finish. It suits smaller bathrooms particularly well, where anything too bold or heavy can start to feel overwhelming.
Choosing the Right Height
Full-height panelling makes the strongest statement, wrapping the whole room in texture and, in a genuinely high-ceilinged Victorian bathroom, it can look properly dramatic. Half-height panelling, at dado rail level, is the more common choice though — it’s less of a commitment, generally more practical around plumbing and fixtures, and still gives you plenty of character.
Room proportions matter here more than people expect. A tall, generous Victorian bathroom can carry full-height panelling without feeling boxed in. A smaller, lower-ceilinged room usually looks better with something around dado height, which also happens to be a nice way to mimic the dado rails found elsewhere in the house.
Materials for a Wet Environment
This is where panelling either goes well or goes badly wrong, so it’s worth getting right.
Moisture-Resistant Timber and Engineered Wood
Standard softwood isn’t built to cope with a bathroom’s humidity long-term. Moisture-resistant timber, or engineered wood products specifically designed for wet environments, are the safer starting point.
MDF vs Genuine Timber
MDF is cheaper and, provided it’s a moisture-resistant grade, performs reasonably well in a bathroom area. Genuine timber costs more but has a real long-lasting nature and a noticeably better feel — worth the extra spend if the budget allows.
Marine-Grade and Bathroom-Rated Products
Marine-grade ply and dedicated bathroom panelling products are built specifically to withstand sustained damp and condensation, and they’re generally the safest choice wherever the panelling is going to be exposed to genuinely high humidity.
Where Panelling Shouldn’t Go
Even with the right materials, it’s best to keep panelling out of direct water contact — inside a shower enclosure, or right against a bath where splashing is unavoidable. Panelling works brilliantly around a room; it’s less suited to being the actual shower wall.
Colour and Finish Ideas
Heritage Paint Colours
Sage green, heritage blue, a warm off-white, or a deep charcoal all sit comfortably with panelling in a period property. These tones lean into the era rather than fighting it, and they photograph beautifully against brass or nickel fittings.
Sheen Level
Go for eggshell or satin rather than a flat matte finish. It’s a small detail, but a bit of sheen makes cleaning much easier and gives the paint far better resistance to condensation over time.
Pairing With Hardware
Panelling painted in a heritage colour looks particularly good alongside brass or nickel taps, towel rails, and handles — the heat of the metal against a muted paint colour is a genuinely reliable combination.
Natural Wood vs Painted
A natural, stained timber finish brings out the grain and suits a slightly more rustic take on the period look. Painted panelling is more common in London properties though, since it ties in more easily with the rest of a considered colour scheme.
Installation and Waterproofing Considerations
Sealing Joints Properly
Every joint, and the skirting line especially, needs proper sealing to stop moisture creeping in behind the panelling. This is genuinely the step that determines whether panelling lasts for decades or starts failing within a couple of years.
Keeping Clear of Splash Zones
As mentioned above, panelling should generally stay out of direct shower and bath splash areas. Where you do want panelling near water, it needs a genuinely robust waterproof treatment, not just a standard bathroom paint.
Ventilation
Good extraction is essential to protect timber panelling long-term. Without it, condensation builds up and starts working its way into the wood, whatever finish you’ve used — this matters more with panelling than it does with tiling, since timber is simply more vulnerable to sustained damp.
Working Panelling Around Period Features
Working With Existing Mouldings
The best results come from lining panelling up with cornicing, skirting, and door mouldings that are already in the room, rather than treating the panelling as something separate. It should look like it belongs to the same joinery scheme as everything else.
Panelling Around Alcoves and Windows
Chimney breasts, alcoves, and original sash windows all need a bit of thought when panelling goes in — running panelling neatly into these features, rather than around them, tends to give a far more considered, deliberate result.
Avoiding a Mismatched Look
The one thing to watch for is ending up with panelling that reads as a separate addition rather than part of the room — mismatched proportions, a moulding profile that doesn’t relate to anything else in the house, or a colour that clashes with existing period features. Get the proportions and detailing right, and it should feel like it’s always been there.
Bringing Everything Together
Panelling is one of the most effective ways to bring actual warmth and period character into a Victorian or Edwardian bathroom, provided the material choice and waterproofing are properly thought through from the start. Get those two things right, and panelling holds up beautifully for years, by adding exactly the kind of texture and detailing that ties a converted bathroom back into the rest of a period home.
If you’re planning a bathroom renovation and want help designing a panelling scheme that suits your property, get in touch for a tailored consultation.
